Reinforcement Learning (RL)#
Below, we describe how to implement a deep Q network (DQN) in AutonomySim. We use a Gynamsium (previously OpenAI Gym) wrapper around the AutomomySim API together with the OpenAI Stable Baselines implementations of standard RL algorithms. We recommend installing stable-baselines3 from the DLR Institute of Robotics and Mechatronics to run these examples.
Warning
This is still in active development. The below is a framework that can be extended and tweaked to obtain better performance.
Wrapping Gymnasium or Gym#
In order to use AutonomySim as a gym environment, we extend and reimplement the base methods such as step, _get_obs, _compute_reward and reset specific to AutonomySim and the task of interest. The sample environments used in these examples for cars and drones can be seen here: PythonClient/reinforcement_learning/*_env.py
Learning to Control Rovers#
Note
The source code is here
This example works with the Neighborhood environment available in releases.
First, we need to capture and transform images from the simulation. Below, we show how a depth image can be obtained from the ego camera and transformed to an 84x84 tensor for input into the network.
Note
You can use other sensor modalities and sensor inputs as well, but you'll have to modify the code accordingly.
responses = client.simGetImages([ImageRequest(0, AutonomySimImageType.DepthPerspective, True, False)])
current_state = transform_input(responses)
We define six actions (i.e., brake, straight with throttle, full-left with throttle, full-right with throttle, half-left with throttle, half-right with throttle) that an agent can execute. This is done via the function interpret_action:
def interpret_action(action):
    car_controls.brake = 0              # throttle (initial)
    car_controls.throttle = 1           # ...
    if action == 0:                     #
        car_controls.throttle = 0       # brake
        car_controls.brake = 1          # ...
    elif action == 1:                   #
        car_controls.steering = 0       # steer center
    elif action == 2:                   #
        car_controls.steering = 0.5     # steer right
    elif action == 3:                   #
        car_controls.steering = -0.5    # steer left
    elif action == 4:                   #
        car_controls.steering = 0.25    # steer half-right
    else:                               #
        car_controls.steering = -0.25   # steer half-left
    return car_controls
We then define the reward function in _compute_reward as a convex combination of how fast the vehicle is travelling and how much it deviates from the center line. The agent gets a high reward when moving fast and staying in the center of the lane.
def _compute_reward(car_state):
    MAX_SPEED = 300
    MIN_SPEED = 10
    thresh_dist = 3.5
    beta = 3

    z = 0
    pts = [np.array([0, -1, z]), np.array([130, -1, z]), np.array([130, 125, z]), np.array([0, 125, z]), np.array([0, -1, z]), np.array([130, -1, z]), np.array([130, -128, z]), np.array([0, -128, z]), np.array([0, -1, z])]
    pd = car_state.position
    car_pt = np.array(list(pd.values()))

    dist = 10000000
    for i in range(0, len(pts)-1):
        dist = min(dist, np.linalg.norm(np.cross((car_pt - pts[i]), (car_pt - pts[i+1])))/np.linalg.norm(pts[i]-pts[i+1]))

    # print(dist)
    if dist > thresh_dist:
        reward = -3
    else:
        reward_dist = (math.exp(-beta*dist) - 0.5)
        reward_speed = (((car_state.speed - MIN_SPEED)/(MAX_SPEED - MIN_SPEED)) - 0.5)
        reward = reward_dist + reward_speed

    return reward
The computed reward function also subsequently determines if the episode has terminated (e.g., due to collision). We look at the speed of the vehicle and if it is less than a threshold, the episode is considered terminated.
done = 0
if reward < -1:
    done = 1
if car_controls.brake == 0:
    if car_state.speed <= 5:
        done = 1
return done
The main loop then sequences through obtaining the image, computing the action to take according to the current policy, getting a reward, and so forth. If the episode terminates, we reset the vehicle to the original state via reset():
client.reset()
client.enableApiControl(True)
client.armDisarm(True)
car_control = interpret_action(1) // Reset position and drive straight for one second
client.setCarControls(car_control)
time.sleep(1)
Once a Gym environment wrapper is defined as in car_env.py, we make use of stable-baselines3 to run a DQN training loop. The DQN training can be configured as seen in dqn_car.py:
model = DQN(
    "CnnPolicy",
    env,
    learning_rate=0.00025,
    verbose=1,
    batch_size=32,
    train_freq=4,
    target_update_interval=10000,
    learning_starts=200000,
    buffer_size=500000,
    max_grad_norm=10,
    exploration_fraction=0.1,
    exploration_final_eps=0.01,
    device="cuda",
    tensorboard_log="./tb_logs/",
)
Training and evaluation environments can be defined (see EvalCallback in dqn_car.py). The evaluation environoment can be different from the one used for training, with different termination conditions or scene configuration. A tensorboard log directory is defined in the DQN parameters. Finally, model.learn() starts the DQN training loop. Implementations of other RL algorithms such as proximal policy optimization (PPO), asynchronous advantage actor-critic (A3C), and others, can be found in stable-baselines3.
Note
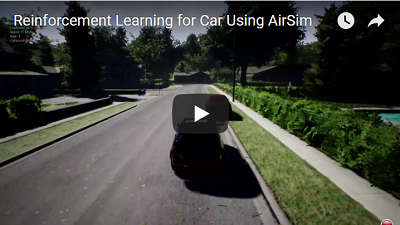
The simulation needs to be up and running before you execute dqn_car.py. The video below shows first few episodes of DQN training.
Learning to Control Drones#
This example works with the MountainLandscape environment available in releases.
We can also apply RL to learn drone control policies. Below is an example of training a quadrotor to follow along high-tension power lines (e.g., for autonomous inspections). We specify a discrete action space with seven actions: six directions and one hovering action.
def interpret_action(self, action):
    if action == 0:
        quad_offset = (self.step_length, 0, 0)  # step x-axis positive
    elif action == 1:
        quad_offset = (0, self.step_length, 0)  # step y-axis positive
    elif action == 2:
        quad_offset = (0, 0, self.step_length)  # step z-axis positive
    elif action == 3:
        quad_offset = (-self.step_length, 0, 0) # step x-axis negative
    elif action == 4:
        quad_offset = (0, -self.step_length, 0) # step y-axis negative
    elif action == 5:
        quad_offset = (0, 0, -self.step_length) # step z-axis negative
    else:
        quad_offset = (0, 0, 0)                 # center coordinates
Again, the reward is a joint function of the quadrotor speed and distance from the power lines.
def compute_reward(quad_state, quad_vel, collision_info):
    thresh_dist = 7
    beta = 1

    z = -10
    pts = [np.array([-0.55265, -31.9786, -19.0225]),np.array([48.59735, -63.3286, -60.07256]),np.array([193.5974, -55.0786, -46.32256]),np.array([369.2474, 35.32137, -62.5725]),np.array([541.3474, 143.6714, -32.07256]),]

    quad_pt = np.array(list((self.state["position"].x_val, self.state["position"].y_val,self.state["position"].z_val,)))

    if self.state["collision"]:
        reward = -100
    else:
        dist = 10000000
        for i in range(0, len(pts) - 1):
            dist = min(dist, np.linalg.norm(np.cross((quad_pt - pts[i]), (quad_pt - pts[i + 1]))) / np.linalg.norm(pts[i] - pts[i + 1]))

        if dist > thresh_dist:
            reward = -10
        else:
            reward_dist = math.exp(-beta * dist) - 0.5
            reward_speed = (np.linalg.norm([self.state["velocity"].x_val, self.state["velocity"].y_val, self.state["velocity"].z_val,])- 0.5)
            reward = reward_dist + reward_speed
We consider an episode to terminate if the quadrotor drifts too far from the power lines. We then reset the drone to its starting position.
Once a Gym environment wrapper is defined as in drone_env.py, we use stable-baselines3 to run a DQN training loop. The DQN training can be configured as seen in dqn_drone.py:
model = DQN(
    "CnnPolicy",
    env,
    learning_rate=0.00025,
    verbose=1,
    batch_size=32,
    train_freq=4,
    target_update_interval=10000,
    learning_starts=10000,
    buffer_size=500000,
    max_grad_norm=10,
    exploration_fraction=0.1,
    exploration_final_eps=0.01,
    device="cuda",
    tensorboard_log="./tb_logs/",
)
Training and evaluation environments can be defined (see EvalCallback in dqn_car.py). The evaluation environoment can be different from the one used for training, with different termination conditions or scene configuration. A tensorboard log directory is defined in the DQN parameters. Finally, model.learn() starts the DQN training loop. Implementations of other RL algorithms such as proximal policy optimization (PPO), asynchronous advantage actor-critic (A3C), and others, can be found in stable-baselines3.
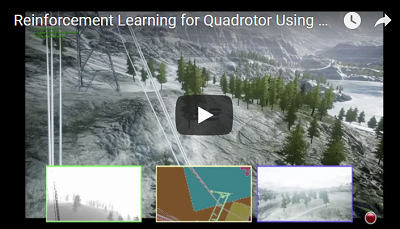
Here is the video of first few episodes during the training.
Related#
Also see The Autonomous Driving Cookbook by the Microsoft Deep Learning and Robotics Garage Chapter.